
A website is the most essential part of a business online presence. It’s how one present their business to potential customers. So it’s very important that a website is as good as it can possibly be. A lot of factors go into this: the design, the functionality, the content posted, and more. And it’s the business job to constantly improve on them. But overhauling the entire website every week is not exactly a good solution. Instead, one should look into the advantages of using website widgets. Web widgets can help add almost anything to a website, from a simple event calendar to tools for processing customer requests and data online. But what exactly is Stames web widgets? And why should you use them?
What is Stames Web Widget?
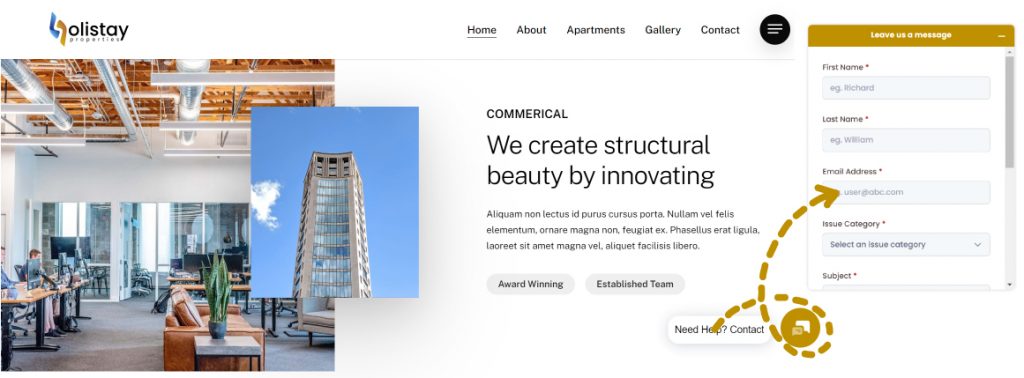
A web widget is a web page or web application that is embedded as an element of a host web page but which is substantially independent of the host page, having limited or no interaction with the host. Stames web widgets fulfill a wide variety of purposes and provide users with the best possible experience. It helps businesses easily install, configure and process vital customer information and data including requests, queries, feedback, complaints, claims and much more.
After sign up for the Stames service, a provisioned JavaScript code snippets are automatically generated.
There are two types of widgets: call-to-action and one-click. Call-to-action widgets when clicked prompts user to take some specified action which includes filling a form to send a request, making a call to the customer service hotline or visiting the support center/helpdesk of the business. One-click widgets on the other hand when clicked pops up a form for the user to submit a request etc to the business.
Major advantages of using website widgets
So why are Stames web widgets great tool for modern business and website?
Free, quick, and easy to install
One of the best things about Stames web widgets is that they are quick and easy solutions that actually work. Adding a Stames web widget is nothing like installing new company software or even changing the theme of your WP website. Stames web widgets are not big modifications to your website. They won’t require any downtime and you don’t even need to put your website in maintenance mode to install them.
Instead, you can add them to your website very quickly and easily. Better yet, they are immediately available for use. Finally, Stames web widgets are FREE. So you don’t even have to pay for all the benefits they bring!
Customizable to suit your needs
The Stames web widget are highly customizable. From changing the color and side text of the widgets, form etc to hiding some optional form fields. For example: a user can hide the issue category form field by setting a default department or issue category for the widget. One can also hide priority, phone number form fields etc.
Enhance website functionality
The biggest advantage of using Stames web widgets is, of course, what they add to your website. The web widget instantly automates customer service and tech support, making them faster and leaving you and your employees with more time to focus on other things.
Drastically improve user experience
The whole point of using widgets is to make your website more appealing to your users. By adding Stames web widget, you’ll improve their experience. Depending on the type of widget you choose, you can provide them with more information, let them interact with the website, make it easier for them to resolve issues on their own, and more. And any digital marketing agency will tell you that user experience is one of the most important things to work on. Plus, it sets you apart from other websites of similar businesses that don’t use widgets.
Increase engagement and conversion
Stames web widgets are interactive. This is definitely a benefit because engagement leads to more time spent on a page. And the more time people spend on your website, browsing your content, the more opportunity you have to convert them.
To install your web widget on your website:
- In the Stames subscription account, go to Account Settings > Integration Settings > Web Widget for the software module in question.
- On the Web Widget settings page, scroll down to the bottom and click on Embed Code button.
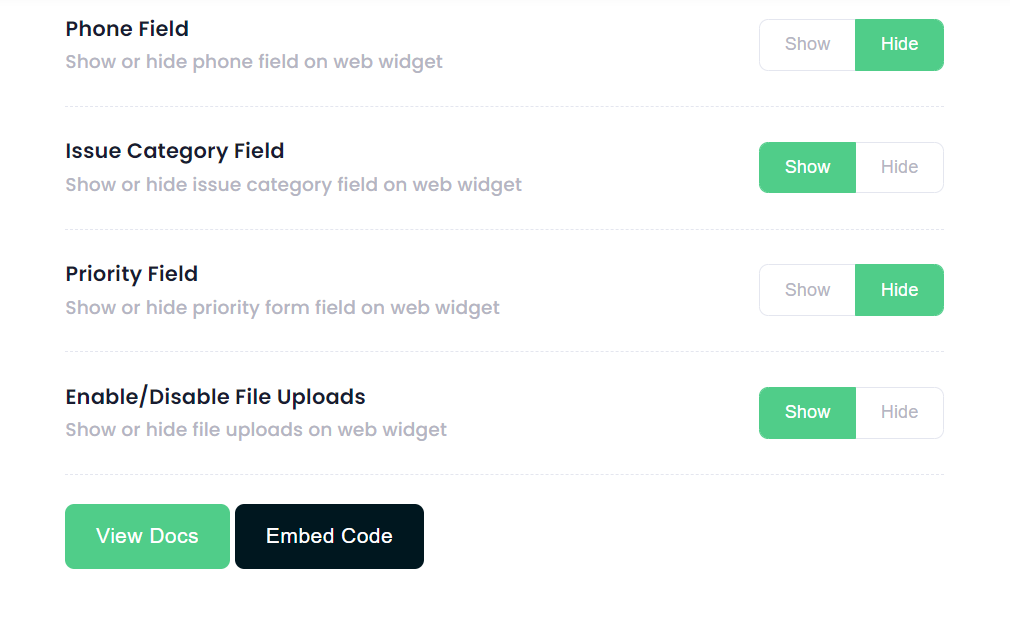
- This would bring up the pop up dialog box that contains the Head tag and Body tag code snippets for both call-to-action and one-click web widgets.

- Copy and paste the code into the appropriate sections of your website HTML. Head tag code snippet must be placed before the </head> tag and Body tag must be placed before the </body> tag of the HTML code.
- Save the website HTML code and voila your web widget is properly installed.
To configure your web widget on your website:
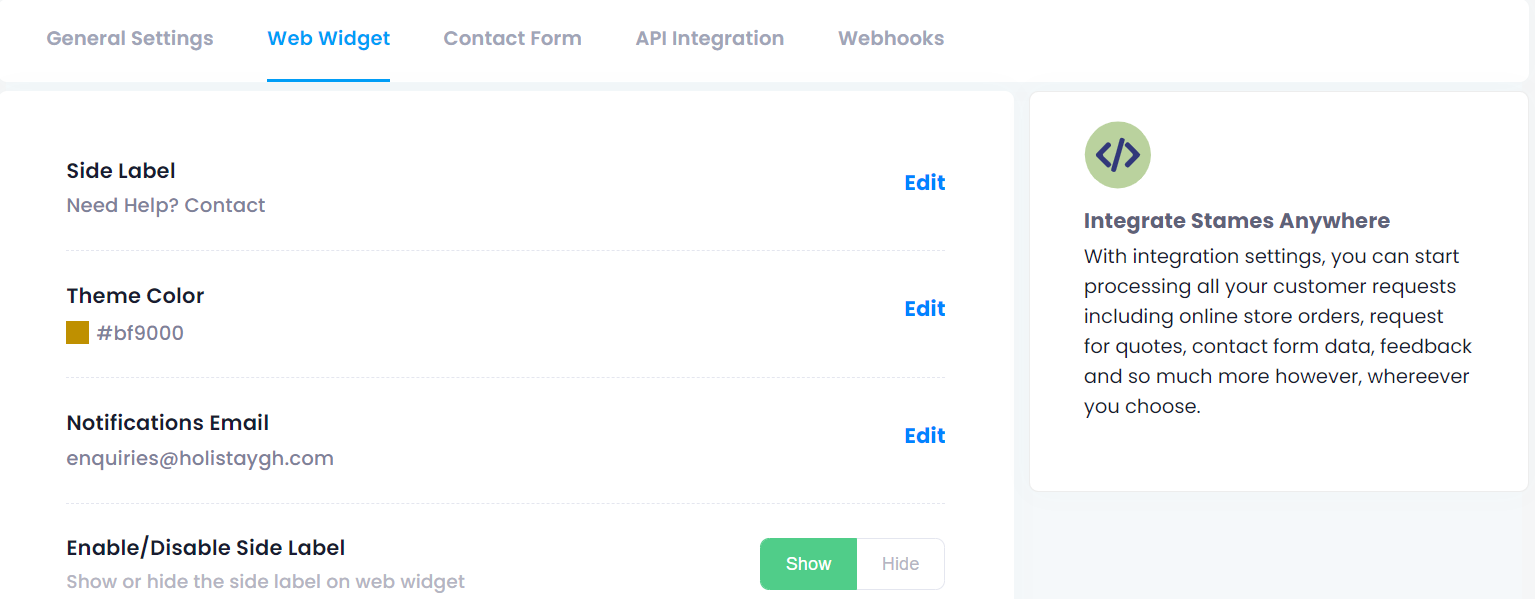
- In the Stames subscription account, go to Account Settings > Integration Settings > Web Widget for the software module in question.
- On the Web Widget settings page, you can change the color theme of the widget by editing the theme field and replacing the color with the options you see or simply type in your preferred hex color code.
- Change the text besides the web widget to whatever text you want by editing the Side Label field..
- Change the notification email address to your preferred email address to receive copies of all mails coming from the web widget. Please note that, the email address you provide shall serve as the only channel to receive requests when your software module expires or closes as you would be unable to login or access the software module until it’s renewed.
- Show or hide form fields like issues category (department) field, phone field, priority field or whether to enable or disable file uploads.
Check out Tutorial video