

Stames is a powerful software which is super packed with awesome features and tools that allows businesses and enterprises to provide support as it relates to leads management, asset management, task management, building effective customer relationship and much more.
To get started you must first choose a plan.
The Entry plan is designed for business-to-customer(B2C) type businesses and only has an admin and staff portal. This plan also allows users to integrate multiple forms into their website and use Stames API to send data to their software module. The Entry plan can also be used for internal purposes such as task management and assignments.
The Combo and Enterprise plan on the other hand is designed for business-to-business(B2B) type businesses that also includes a client portal as well as both an admin and staff portals. These plans both allows businesses build a strong business relationship with their clients. With both plans, admins can create company profiles and connect staff or users from the client company on the network. This allows users on the same network to access the status of a ticket, get a personalized self-service experience including generating reports, managing tickets etc.
The difference between the Combo plan and the Enterprise plan is that enterprise comes with asset management where admin can connect and populate the assets of client company, their sites and location. So when a user on a particular company network is submitting a ticket, the process will help produce more accurate description of assets, sites and location and much more.
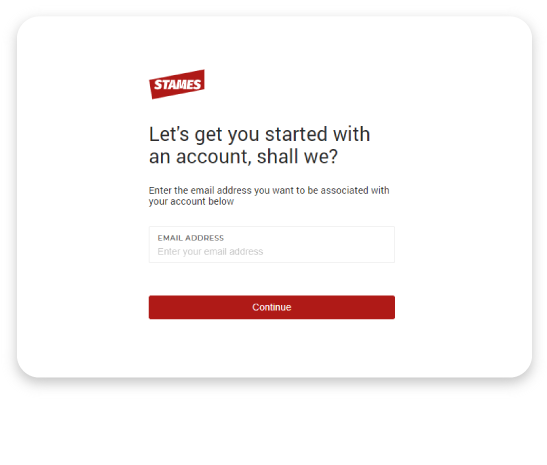
Step 1
Signup for an account
Choose a pricing plan for your software module and start your 60 days free trial as a new user to create your super administrator or subscriber account. The registration process only takes a few minutes.
If you already have an account, you would be required to login to proceed. Stames allows subscribers to create as many software modules as it is required for their business with their one subscriber account.
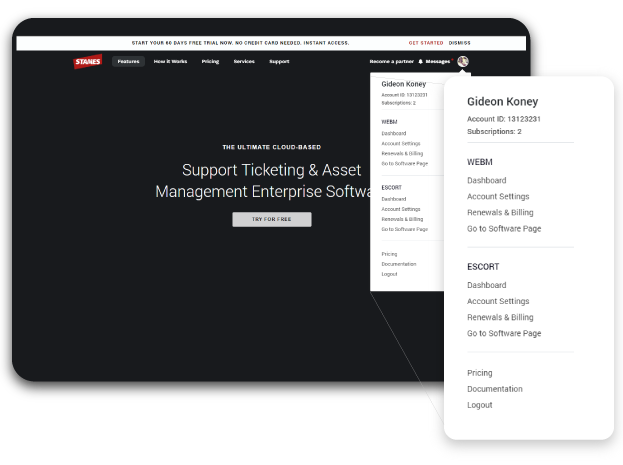
Step 2
Access subscriber account
After successfully completing your registration, you would be required to verify your email before accessing your account. Signing in for the first time, you would be redirected to the homepage where you can access your account information including all your software modules from a dropdown menu of your user account profile image on the header.
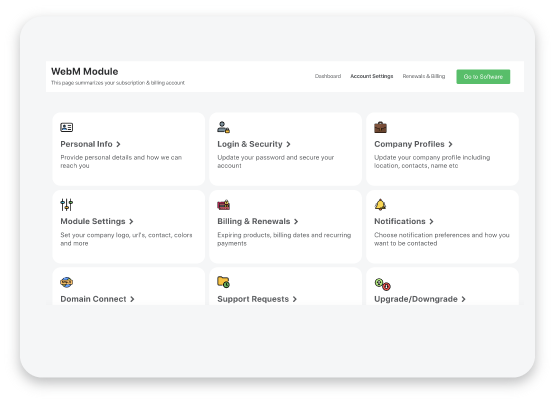
Step 3
Choose module option
From the dropdown menu, choosing a module option will take you directly to the module page. The account dashboard gives a summary of vital module data and activities including module page visits, user account activities, your chosen pricing plan, your recent request update and much more.
The account settings however allows you to update your subscriber and module account settings like notifications, personal info, upgrades & downgrades, company logo and info, domain connection and much more.
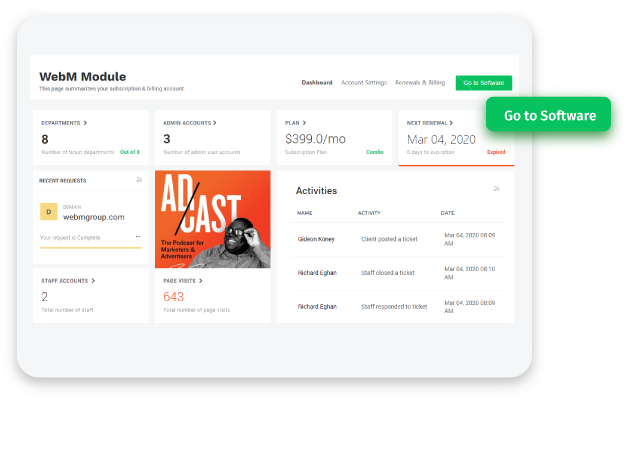
Step 4
Access software module
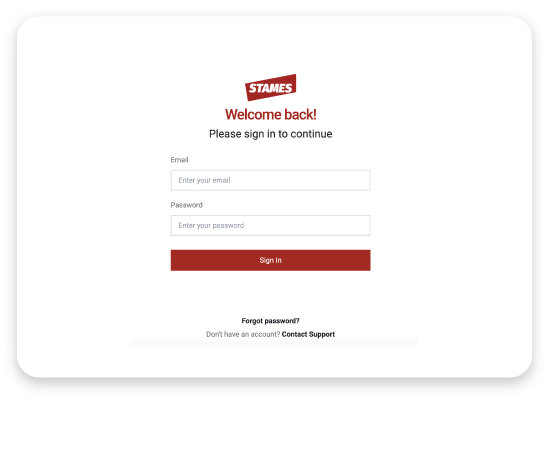
You can easily access your software module from your subscriber account module dashboard by clicking the green button next to billing and renewal link. This will take you directly to the log in page of your software module.
Step 5
Manage user accounts
With the module admin account credentials, created either during your subscriber account registration (if you are a new user) or when ordering another module (if you are already a user), you can gain access to the software module and can now be now be able to create more user accounts including staff, admin etc.
Enjoy 60 days free trial with your first user account here. No credit card needed. Just instant access. Pricing starts from $29/month after trial period ends.


No Comments